
Overview
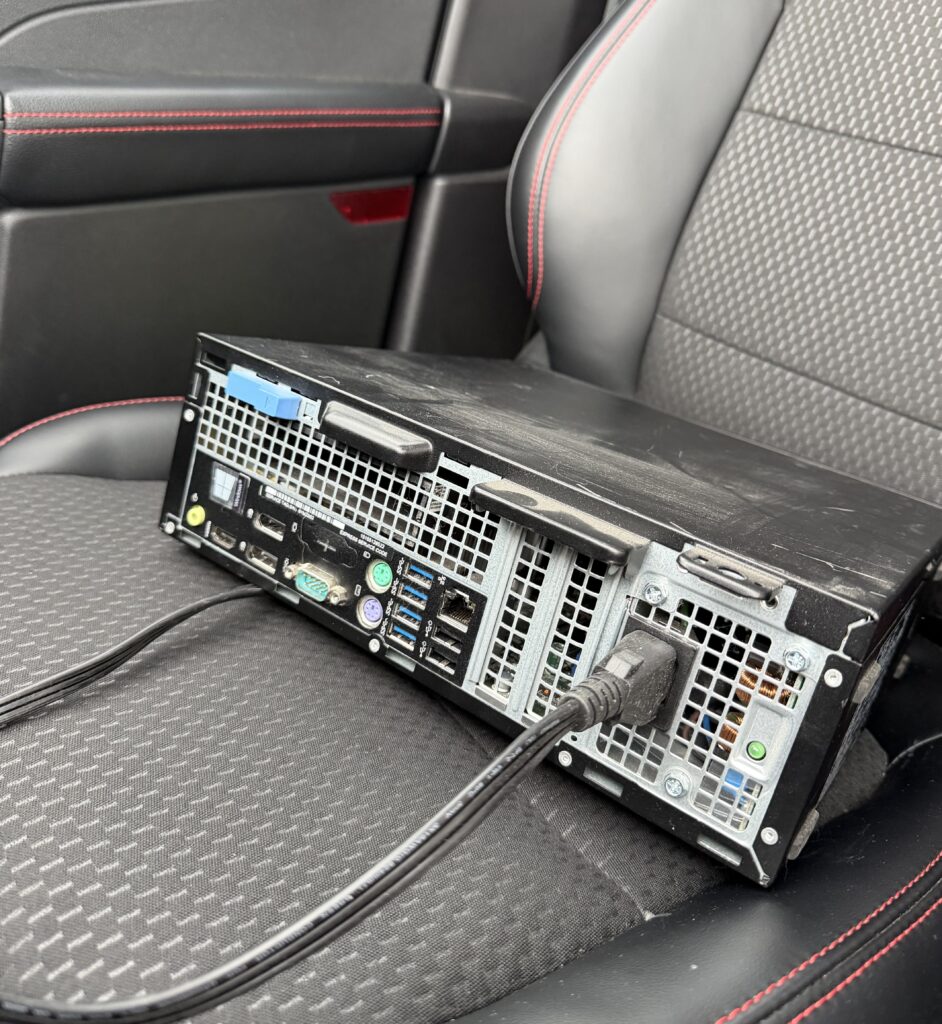
After spending a ton of time building out the security and deployment workflow for my public web server, I wanted a dedicated machine for private infrastructure at home. I was about to buy a used workstation on eBay when my dad gave me a retired Dell OptiPlex 7050 SFF that was no longer being used at his office. It had exactly what I needed: 16GB of DDR4, an Intel Core i5-6500, and a 512GB M.2 SSD already inside.
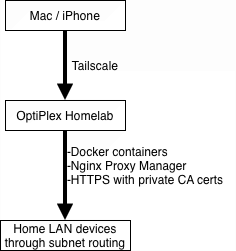
I knew right away what I wanted to do with it. I wanted an always-on machine on my Tailscale network that could act as an exit node and subnet router while running Docker containers and private web apps. From anywhere, I could tunnel back into my home LAN, reach local devices, and use the server like I was sitting at home.
This post walks through how I put that together: Windows 11 Pro, Tailscale, Docker, Nginx Proxy Manager, and local HTTPS backed by a private root CA I manage from an offline Debian VM on my Mac.
The Hardware
The base machine is a Dell OptiPlex 7050 SFF, small, quiet, and more than enough for a first homelab server.
| Component | Spec |
|---|---|
| CPU | Intel Core i5-6500 (4C/4T) |
| RAM | 16GB DDR4-2133 |
| Storage | 512GB M.2 SSD |
| Networking | Intel Gigabit Ethernet |
| Form Factor | Small Form Factor (SFF) |
| Host OS | Windows 11 Pro |
I wiped the previous install and did a clean Windows 11 Pro setup. The OptiPlex is from 2018 and does not pass Microsoft’s TPM 2.0 check out of the box, so I used Rufus to create the installer and bypass that requirement. After the install, I updated the firmware and drivers with Dell Command Update, enabled virtualization in BIOS for Docker, and set up Remote Desktop so I could manage everything from my Mac without keeping a monitor attached.
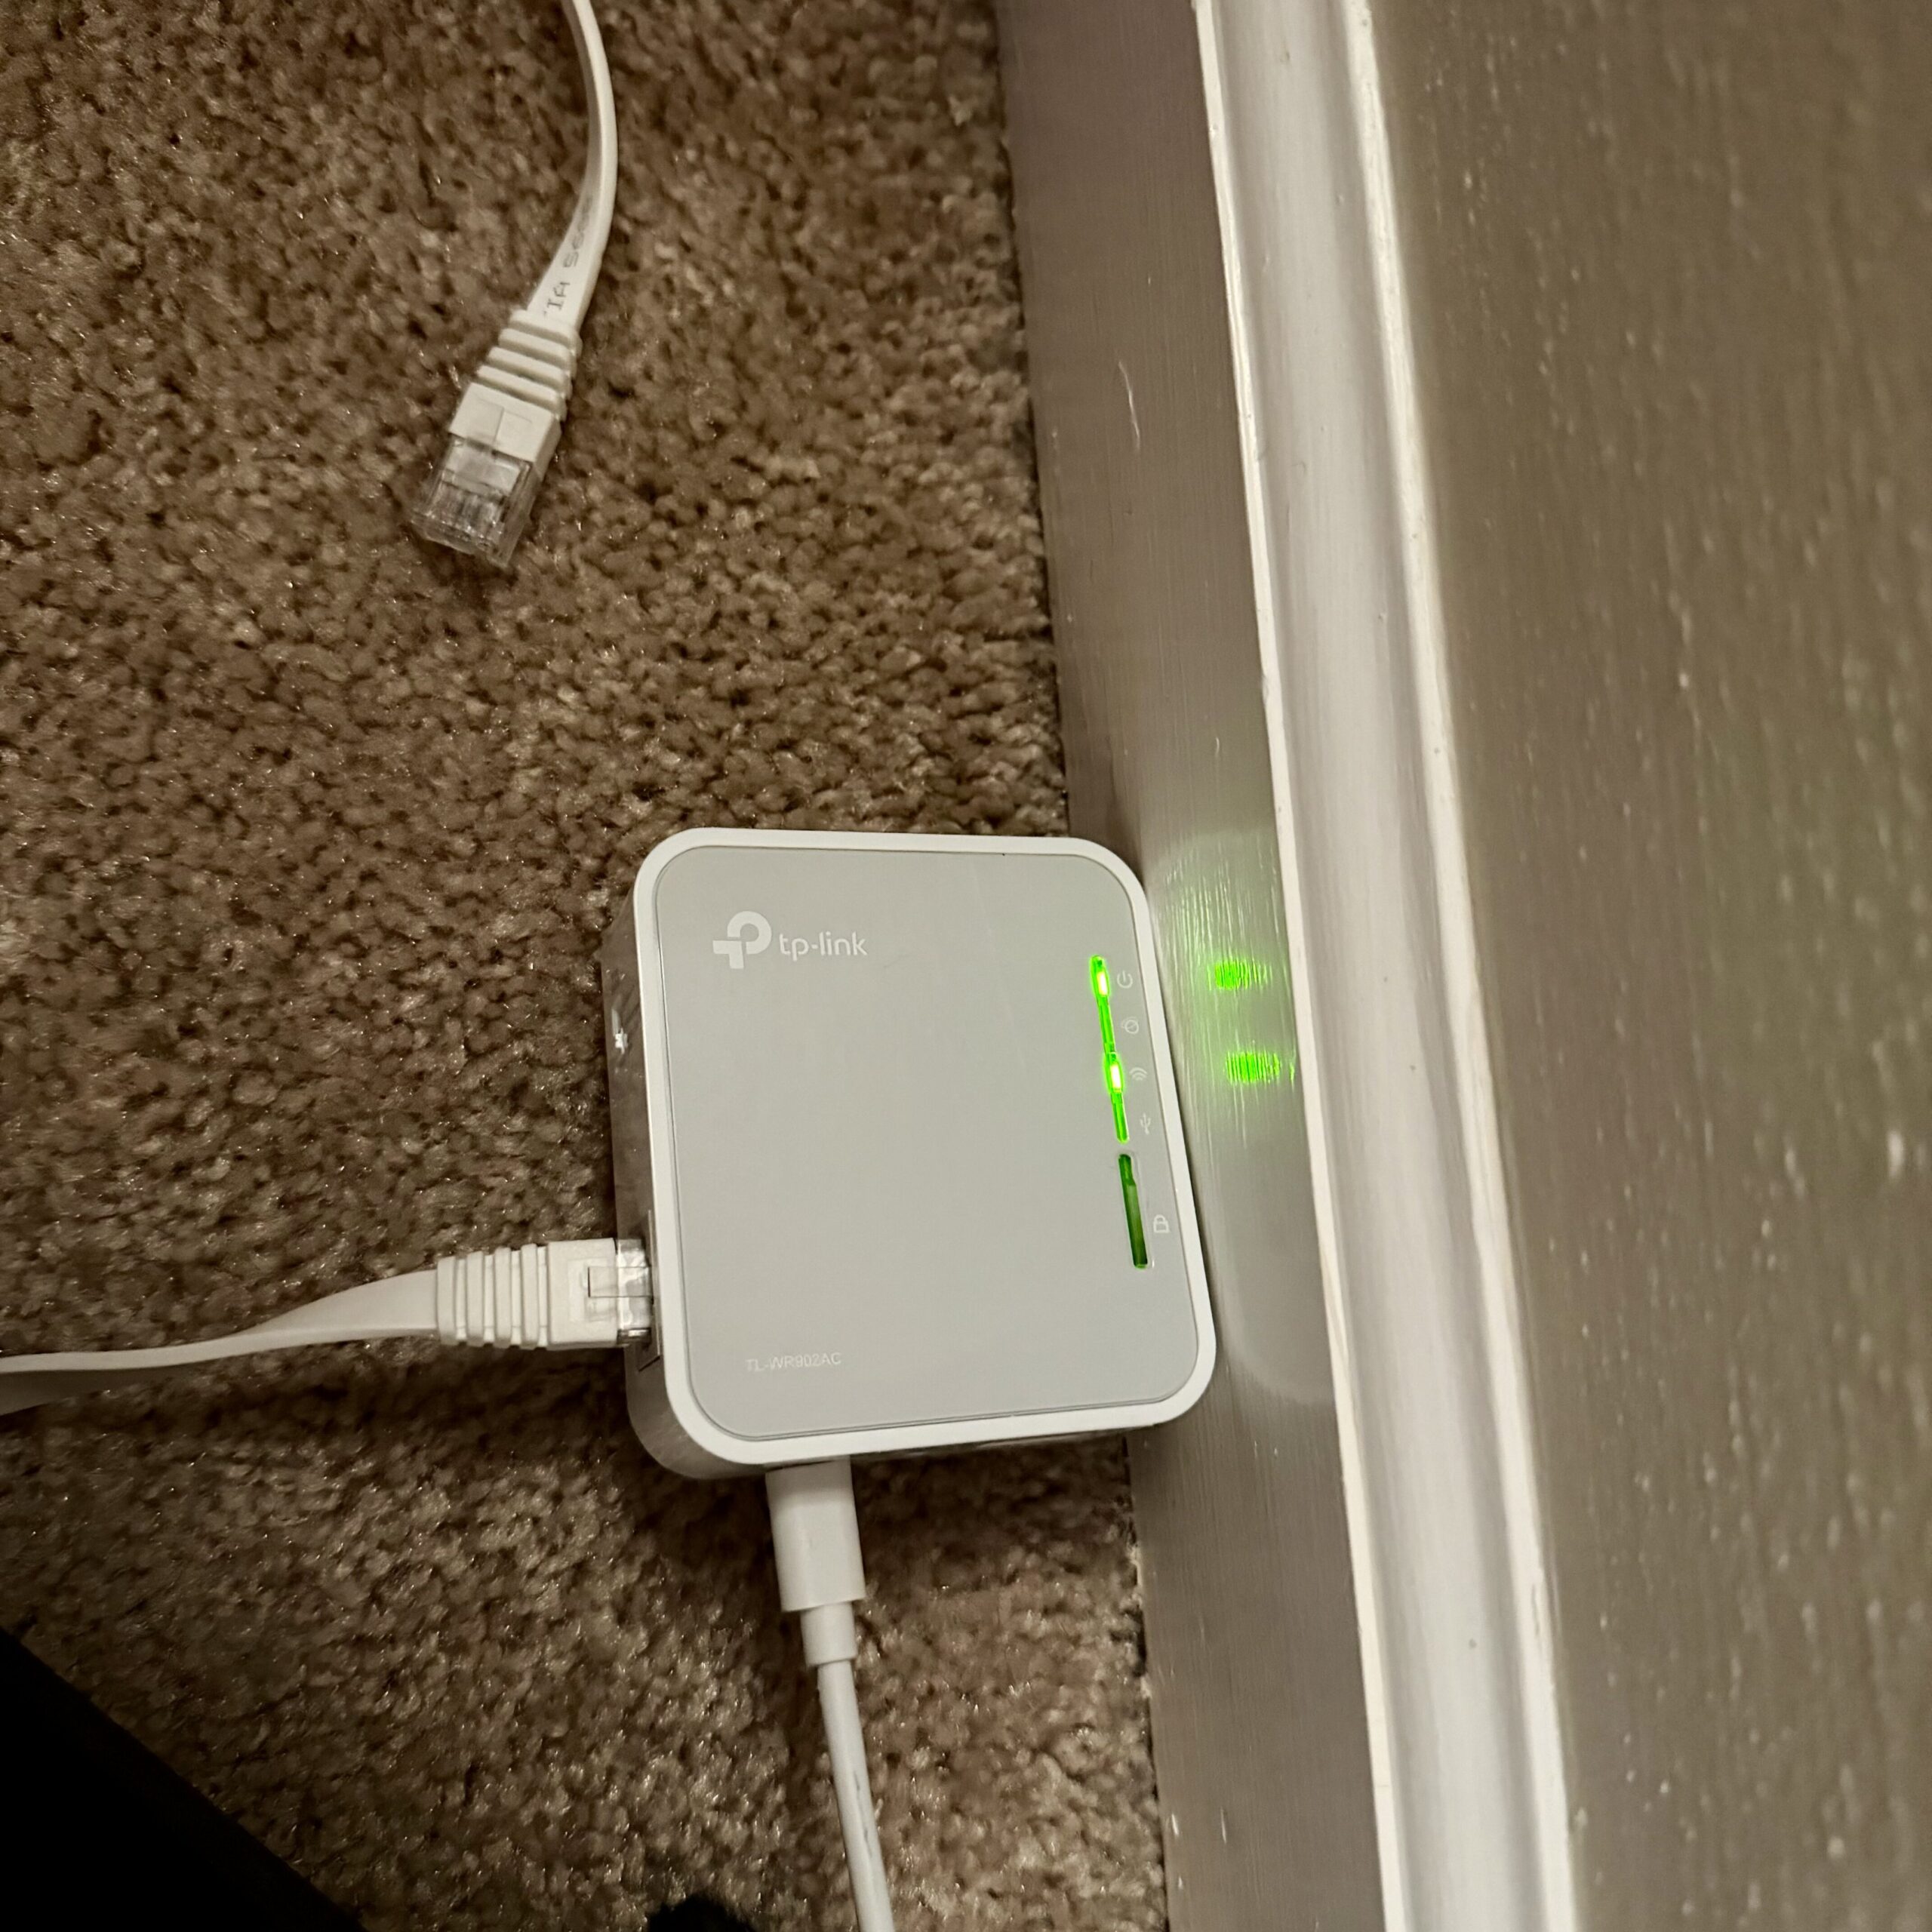
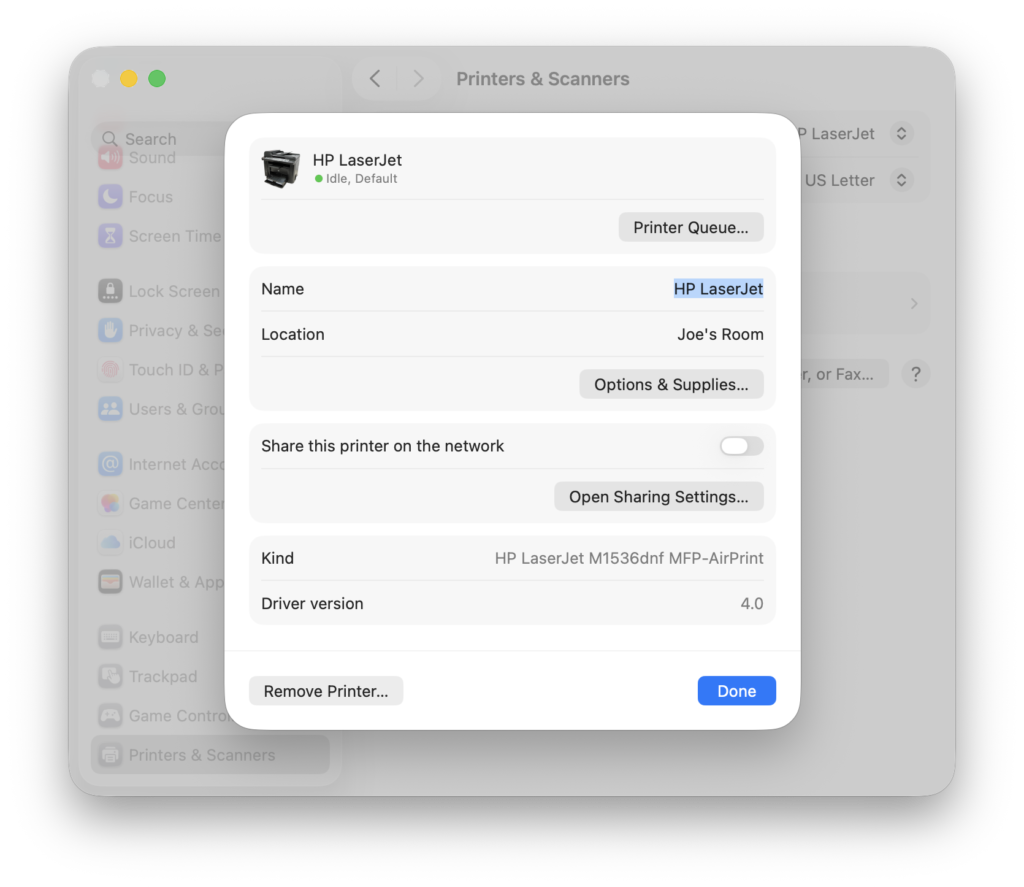
The temporary networking setup was less polished but worked perfectly. My desk area does not have Ethernet, so I used a TP-Link travel router in client mode to bridge WiFi to Ethernet. That let me get the OptiPlex online, install what I needed, and configure Remote Desktop before moving it next to the router for direct Ethernet through my unmanaged switch. I typically use that same adapter for my HP LaserJet, which lets the printer advertise over Bonjour and show up automatically on my devices after my initial setup.
Private Access with Tailscale
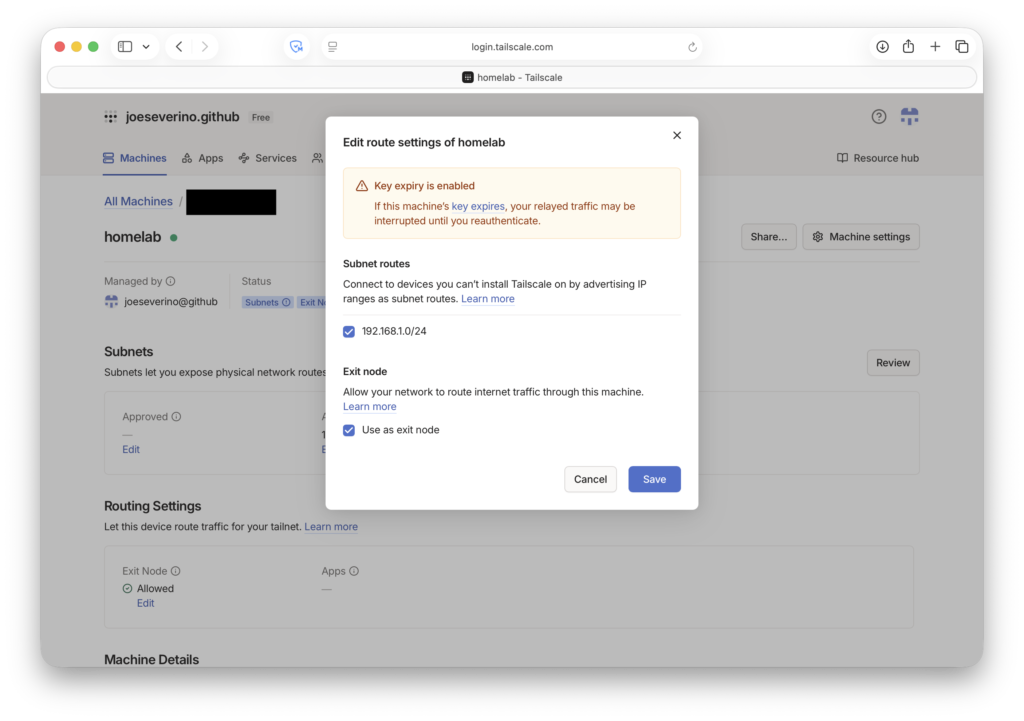
The first major piece was Tailscale. I didn’t want to expose Remote Desktop, SSH, or anything else directly to the internet. Tailscale gives every device a private WireGuard-based IP on my tailnet, so I can reach the homelab securely from my Mac or phone without opening a single port on my router.
On the homelab I enabled two features:
| Feature | What it does |
|---|---|
| Subnet router | Advertises my home LAN (192.168.1.0/24) to my tailnet so I can reach local devices remotely without installing Tailscale on each one |
| Exit node | Routes all my traffic through home when I’m on untrusted networks like hotel WiFi |
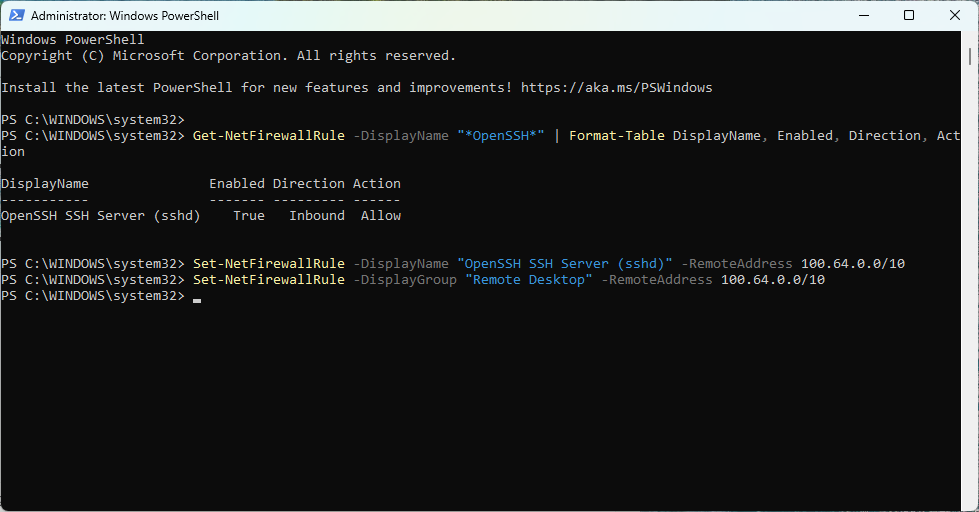
I also locked down Windows Firewall so SSH and Remote Desktop only accept connections from Tailscale’s address range (100.64.0.0/10). If a device isn’t on the tailnet, those ports don’t exist as far as it’s concerned.
Docker and Nginx Proxy Manager
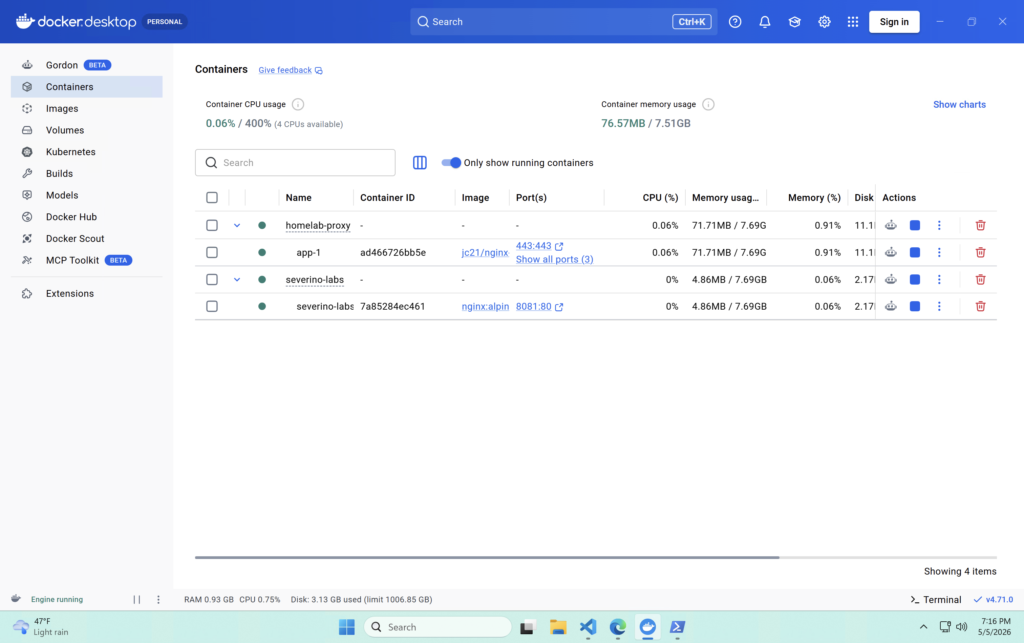
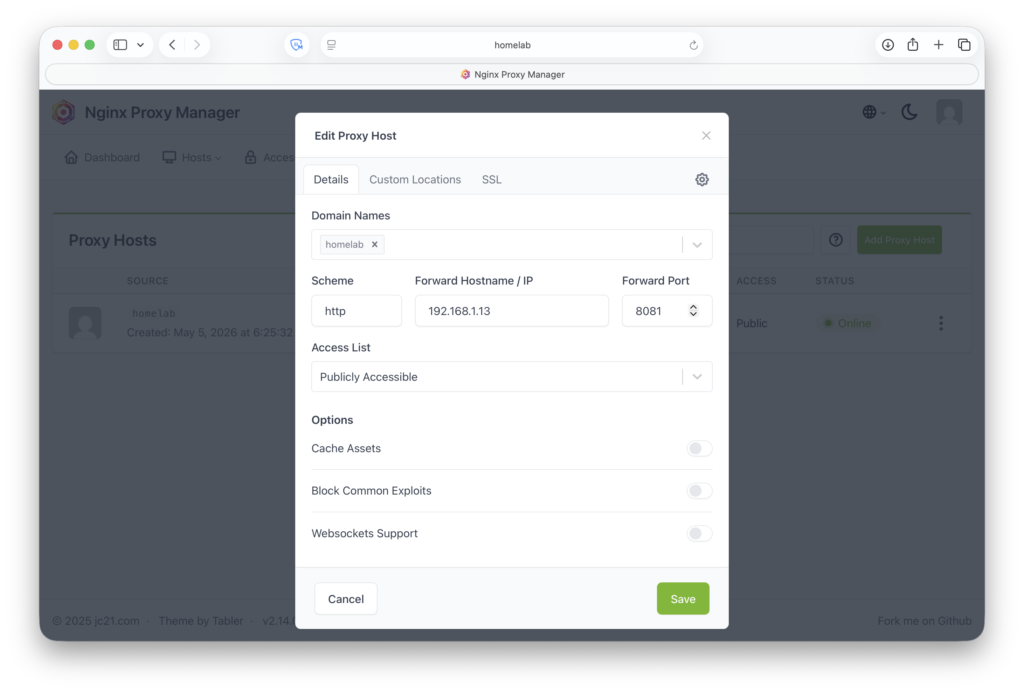
With remote access working, I installed Docker Desktop, confirmed it could pull and run containers, and then set up Nginx Proxy Manager. NPM is a Docker-based reverse proxy with a web UI for managing proxy hosts and SSL certificates. I use it to route the internal homelab hostname to the right container and handle HTTPS termination.
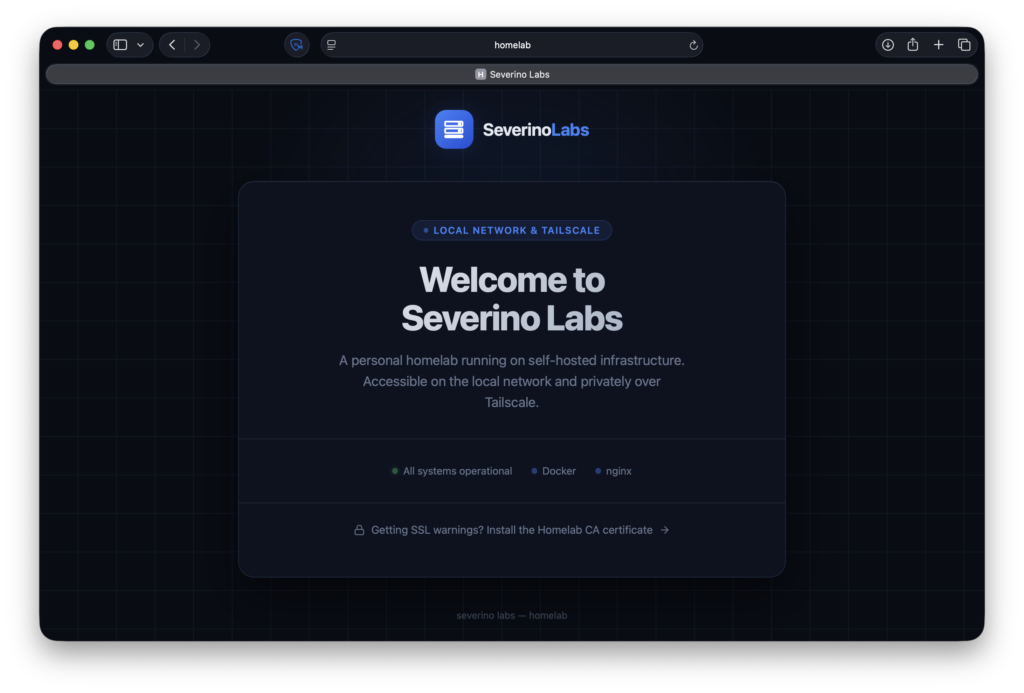
The landing page is intentionally simple: a welcome screen, a status row showing Docker and nginx are up, and a download link for the root CA certificate so other devices on the network can install it.
Local HTTPS with a Private Root CA
This was the part I cared most about getting right. I wanted internal services to use real HTTPS with no browser warnings, without exposing anything publicly just to get a certificate.
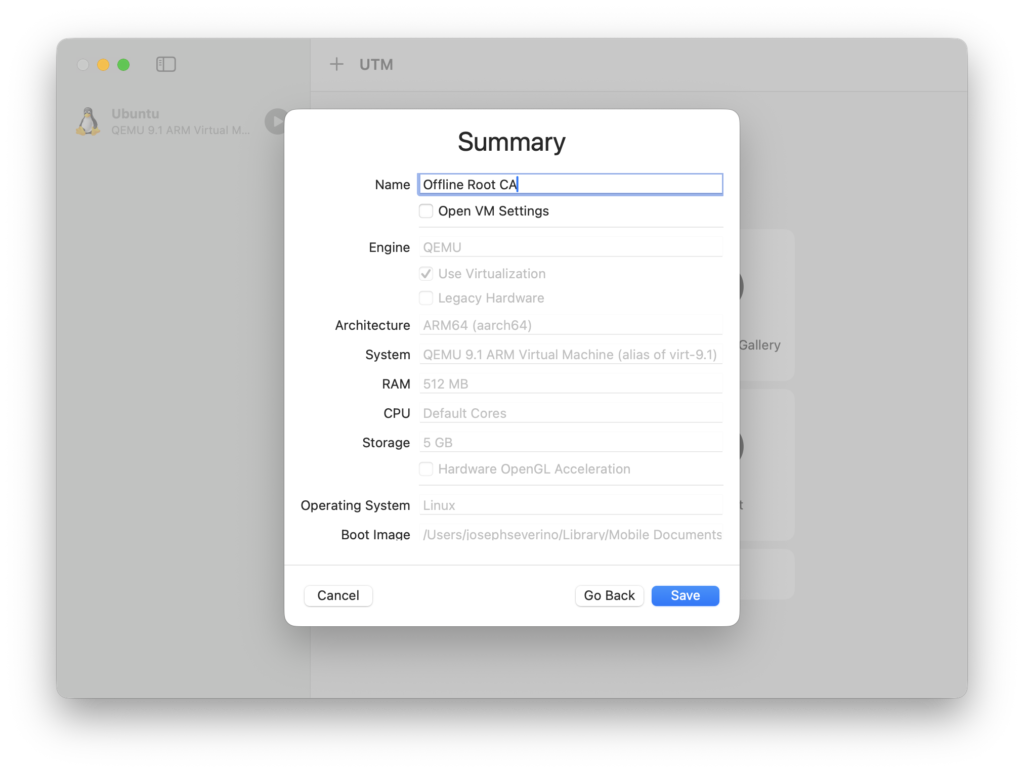
The solution was a private root CA. I set up a small Debian VM in UTM on my Mac to act as the CA environment. It uses host-only networking so it has no internet access and can only communicate with my Mac. The root CA private key stays inside that VM, and I shut it down whenever it’s not actively issuing or renewing a certificate.
For the homelab certificate I generated a key and CSR inside the VM and signed it with the root CA. The certificate includes Subject Alternative Names for both the internal hostname and local IP address, since modern browsers ignore the Common Name field entirely and only validate against the SAN list.
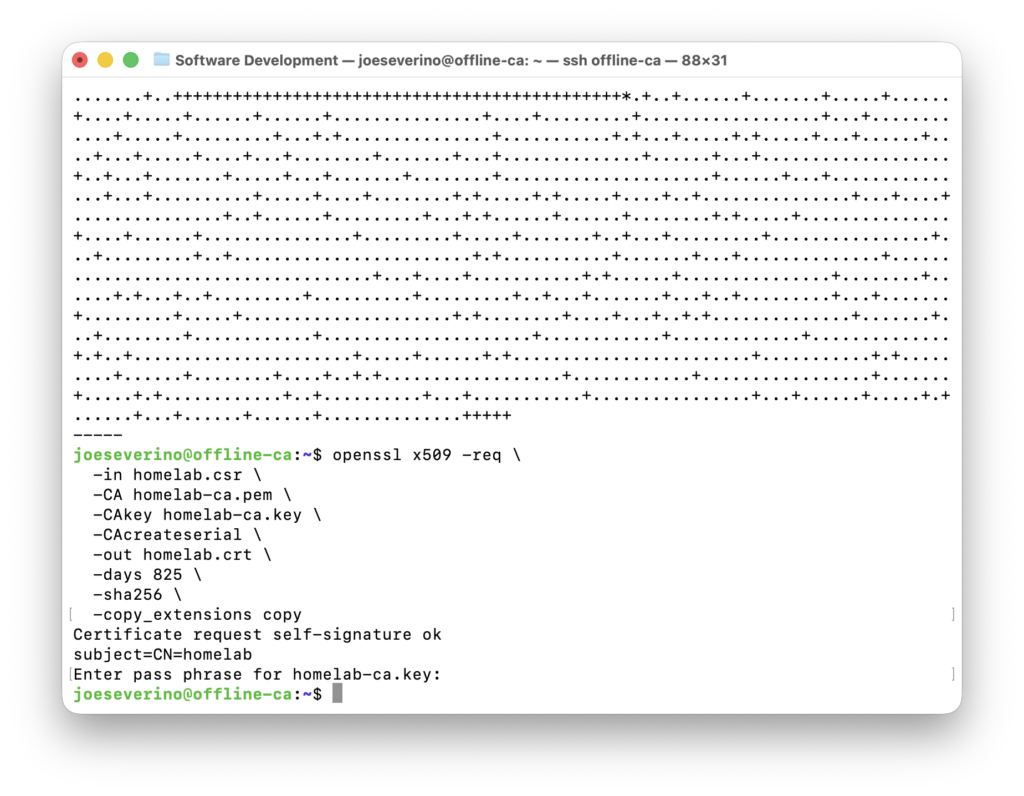
The signing process produces four files:
| File | What it is |
|---|---|
| homelab-ca.pem | The root CA certificate. Install this into device trust stores so they recognize your CA. |
| homelab.crt | The signed certificate for the homelab hostname. Goes on the server. |
| homelab.key | The private key for the homelab cert. Stays on the server. |
| homelab.csr | The signing request. Only needed during issuance. |
I uploaded the server key, signed certificate, and CA certificate chain into Nginx Proxy Manager as a custom certificate, attached it to the homelab proxy host, and enabled Force SSL and HTTP/2.
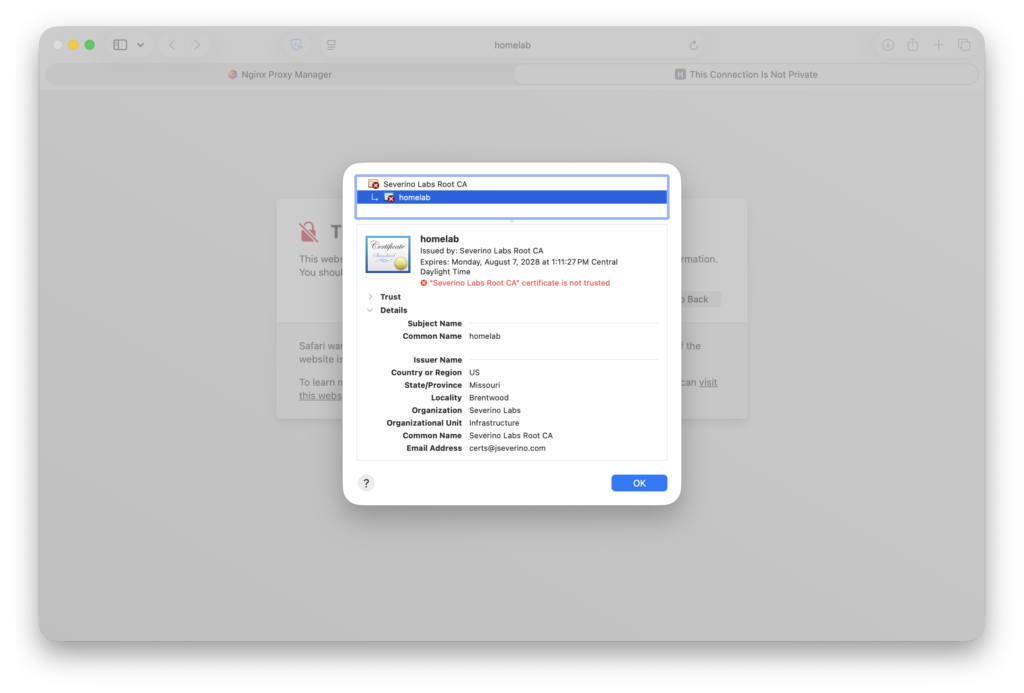
Before installing the root CA on my devices, the browser showed the expected chain warning. The cert was correctly signed but the CA wasn’t recognized yet, so the whole chain failed.
Installing it on macOS is one command:
sudo security add-trusted-cert -d -r trustRoot -k /Library/Keychains/System.keychain homelab-ca.pemOn Windows:
Import-Certificate -FilePath "$env:USERPROFILE\homelab-ca.pem" -CertStoreLocation Cert:\LocalMachine\RootAfter that, https://homelab loads cleanly with no warnings on any device where I have installed the root CA.
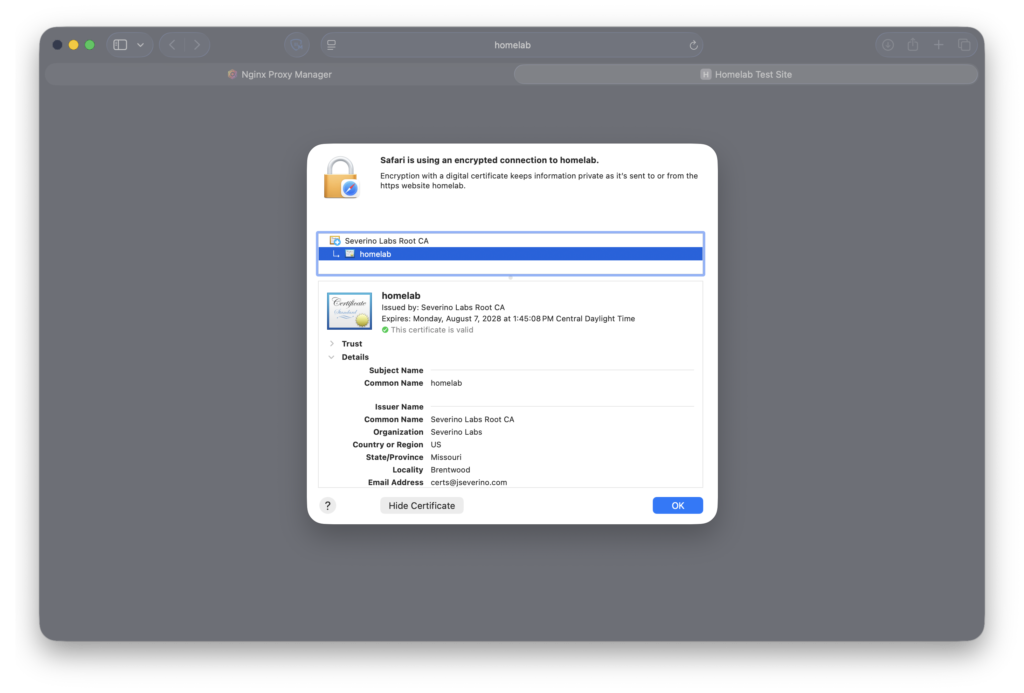
https://homelab loading in Safari with a trusted certificate. The page has a download link for the root CA so other devices on the network can get set up without running commands.Current Stack
At a high level, the flow looks like this:
| Layer | What’s handling it |
|---|---|
| Host machine | Dell OptiPlex 7050 SFF |
| Host OS | Windows 11 Pro |
| Remote access | Tailscale (WireGuard mesh VPN) |
| LAN access | Tailscale subnet router (192.168.1.0/24) |
| Exit node | Tailscale exit node |
| Container runtime | Docker Desktop |
| Reverse proxy + HTTPS | Nginx Proxy Manager |
| Certificate authority | Host-only Debian VM (UTM, Mac) |
| Firewall | SSH and RDP restricted to Tailscale only |
What’s Next
The OptiPlex is running 24/7 with Tailscale, Docker, and Nginx Proxy Manager up, internal HTTPS working across all my devices, and the homelab landing page live. Next up is moving over my Wazuh Manager for security event monitoring and starting to put real private apps behind the proxy. The foundation is in place and that was the important part to get right first.
I’d also like to install AdGuard Home, but more importantly, I need to upgrade my router instead of relying on Spectrum’s WiFi 7 router so I can make more granular networking decisions and policies.